Three document types on the screen. Your country almost certainly offers you fewer, and the one people argue about online is often not available where you are standing. So the useful question is not which document is best in general, it is which of them your issuing country actually gives you and which of those carries a name that matches the rest of your paperwork.
What the screen offers
The identity verification help page sets out the step in one line:
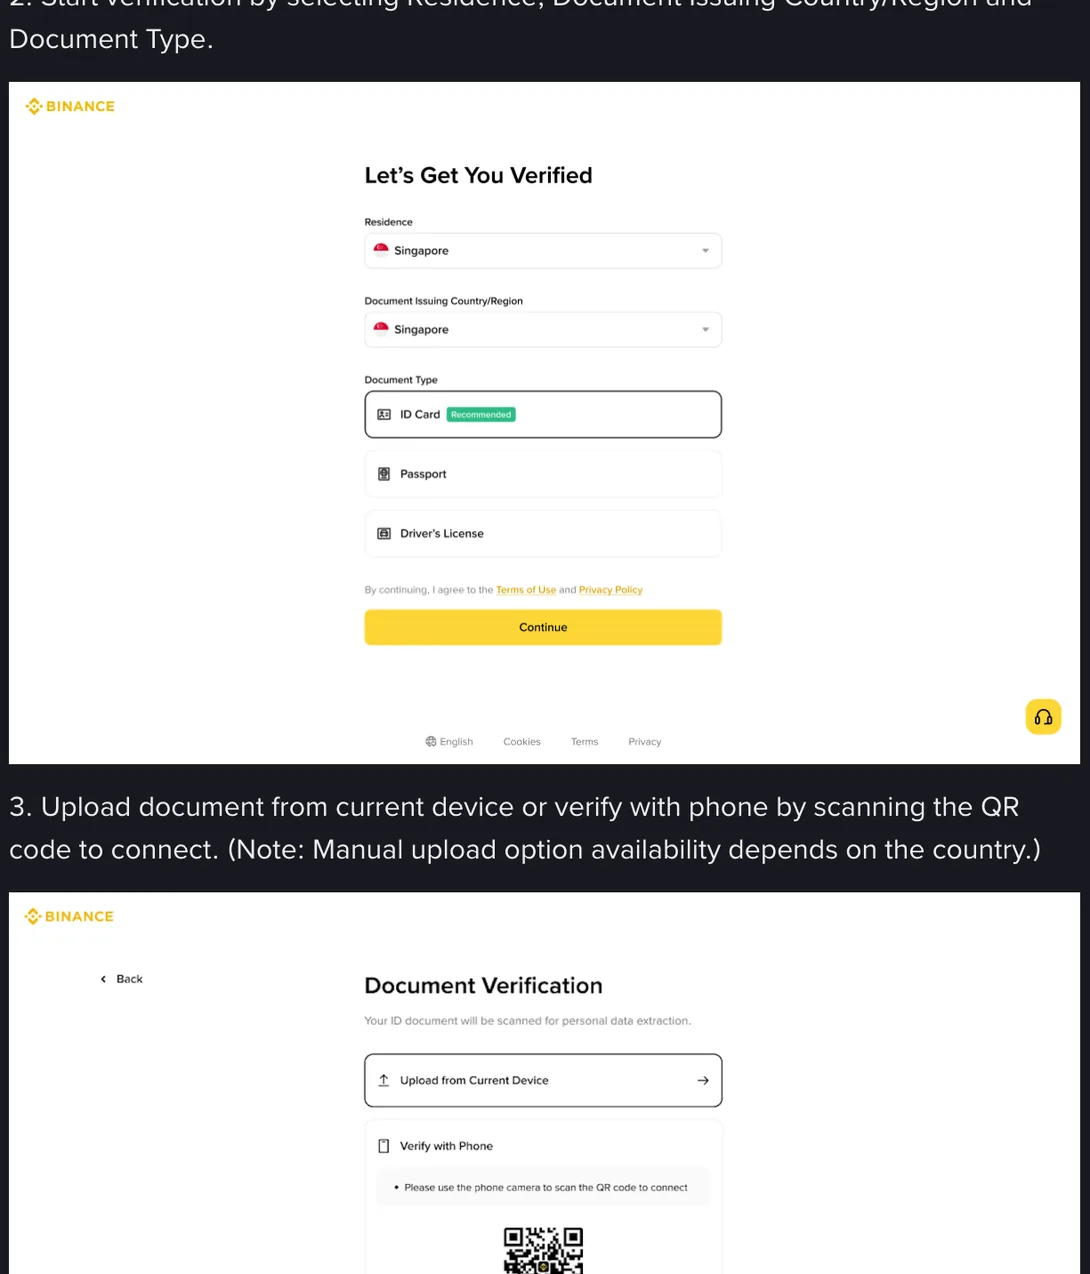
2. Start verification by selecting Residence, Document Issuing Country/Region and Document Type.
Three fields, in that order, and the order matters because the third one depends on the second. Residence is where you live. Document Issuing Country/Region is where the document in your hand was issued. If you live in the country that issued your document, those are the same place and the distinction never surfaces. For students, migrant workers and anyone holding a passport from one country while living in another, they are different, and getting them the wrong way round is expensive later rather than now.
Under Document Type sit the three choices: ID Card with a green Recommended tag beside it, Passport, and Driver’s License. The tag is on the interface itself. It is not a preference some guide author added, and it is the only signal Binance gives about which document it would rather scan.
Why that one is recommended, the page does not say. My own reading, offered as reasoning rather than as fact: a card is a fixed-size object with fields in fixed positions, it lies flat, and two photographs finish it. A passport is a book that has to be held open against its own spine, with a laminated page that throws light back at the camera. Licences vary more in layout from one country to the next than either. That explanation fits what happens when you photograph them, and it is still a guess.
One more line on the same page, easy to skim past, decides whether any of this applies to you at all:
3. Upload document from current device or verify with phone by scanning the QR code to connect. (Note: Manual upload option availability depends on the country.)
Manual upload is not offered everywhere. Where it is not, you are moved onto the phone route with the QR code, and the practical consequence is that your document has to be photographed live rather than picked from a folder of scans you prepared in advance.
Your issuing country shortens the list
Three options on screen, rarely three in your pocket. Here is the shape of the choice in the countries this site is written for.
Pakistan. The CNIC is the ID card. It is the national identity card issued to adult citizens, it is a standard card format with a photograph and a number, and it goes in the option that carries the recommended tag. If you also hold a passport, the CNIC is still the simpler upload, and the passport is the fallback for a card that is worn or close to expiry.
Australia. There is no national identity card, so the ID Card option is not one most residents can fill. That leaves the passport and the state-issued driver licence. Between those two, the passport carries the machine-readable zone described below, and licences differ in layout from one state to another. If you hold both, I would start with the passport and keep the licence as the second attempt.
South Africa. The Smart ID card is a card, and it belongs in the first option. If you still hold the older green barcoded book instead, that is a different physical object entirely, and how the scanner in this flow deals with a bound book is not addressed anywhere on the help pages. If you have both, upload the card.
Kenya. The national identity card, or the passport if the card has faded, cracked at the lamination or lost a corner. The card is the default because it is the document nearly everyone has, and the passport is the answer when the card no longer photographs cleanly.
India. The documents used for identity checks in India are the familiar set: Aadhaar, PAN, the passport, the driving licence. Which of them the flow puts in front of you is generated from the two country fields above Document Type, so the list is produced at the moment you pick India rather than being the same list for everyone. Open the verification page, set Residence and Document Issuing Country/Region to India, and read off the options that appear. That takes about a minute and it is the answer for your account rather than for somebody else’s.
Ask yourself the two separately before you touch the dropdowns. Where do I live? And where was this document issued? People who answer both with the country on their passport, while actually living somewhere else, do not fail at this screen. They fail three screens later, when the address document they upload comes from a country the account says they do not live in.
Five things to weigh when you hold more than one
Assume two documents are both valid and both on the list. The tie-breakers, in the order I would use them.
Which name is on your bank account. This is first, and it is almost never what people think about first. The name you type during verification comes off the document you upload, and everything downstream has to agree with it: the address document, the bank account you might later connect, the transfers you make. If your bank holds a shortened or differently transliterated version of the name printed on your passport, choosing that passport means signing up to explain the difference at every subsequent step. Choose the document whose spelling matches the paperwork you already have, and if none of them match, fix the bank record first. Several of the fields you type on the confirmation screen cannot be edited afterwards, which is the subject of the page on fields you can’t change yourself.
How long it has left. Prefer the document with more time on it. Verification is not a single event that stays done, and an expiry date that falls in six months is a task you are scheduling for yourself.
Whether it has a machine-readable zone. Passports carry two lines of capitals and chevrons at the bottom of the data page. Surname comes first, then two chevrons, then the given names. When you are unsure which of your names the system is going to treat as the surname, that zone is the answer, and reading it takes five seconds. The easy mistake is entering your given name first because that is how you introduce yourself; looking at those two lines before pressing continue catches it.
Whether the card prints an address. Some national cards do and some do not. Where yours does, remember that the address on it was accurate on the day it was issued and may be two moves out of date. It does not substitute for an address document, and if it contradicts the residence you selected, you have created a question for somebody to ask you later.
Which one you are willing to keep using. Whatever you upload becomes the reference copy of your identity on that account. Re-checks compare against it. If your plan is to move country next year, or to renew a card, think about which document will still be the sensible one to hold up in eighteen months.
Two constraints that arrive on the upload screen
Once the document type is chosen, the upload screen adds two things worth knowing in advance, because both of them change what you should have ready.
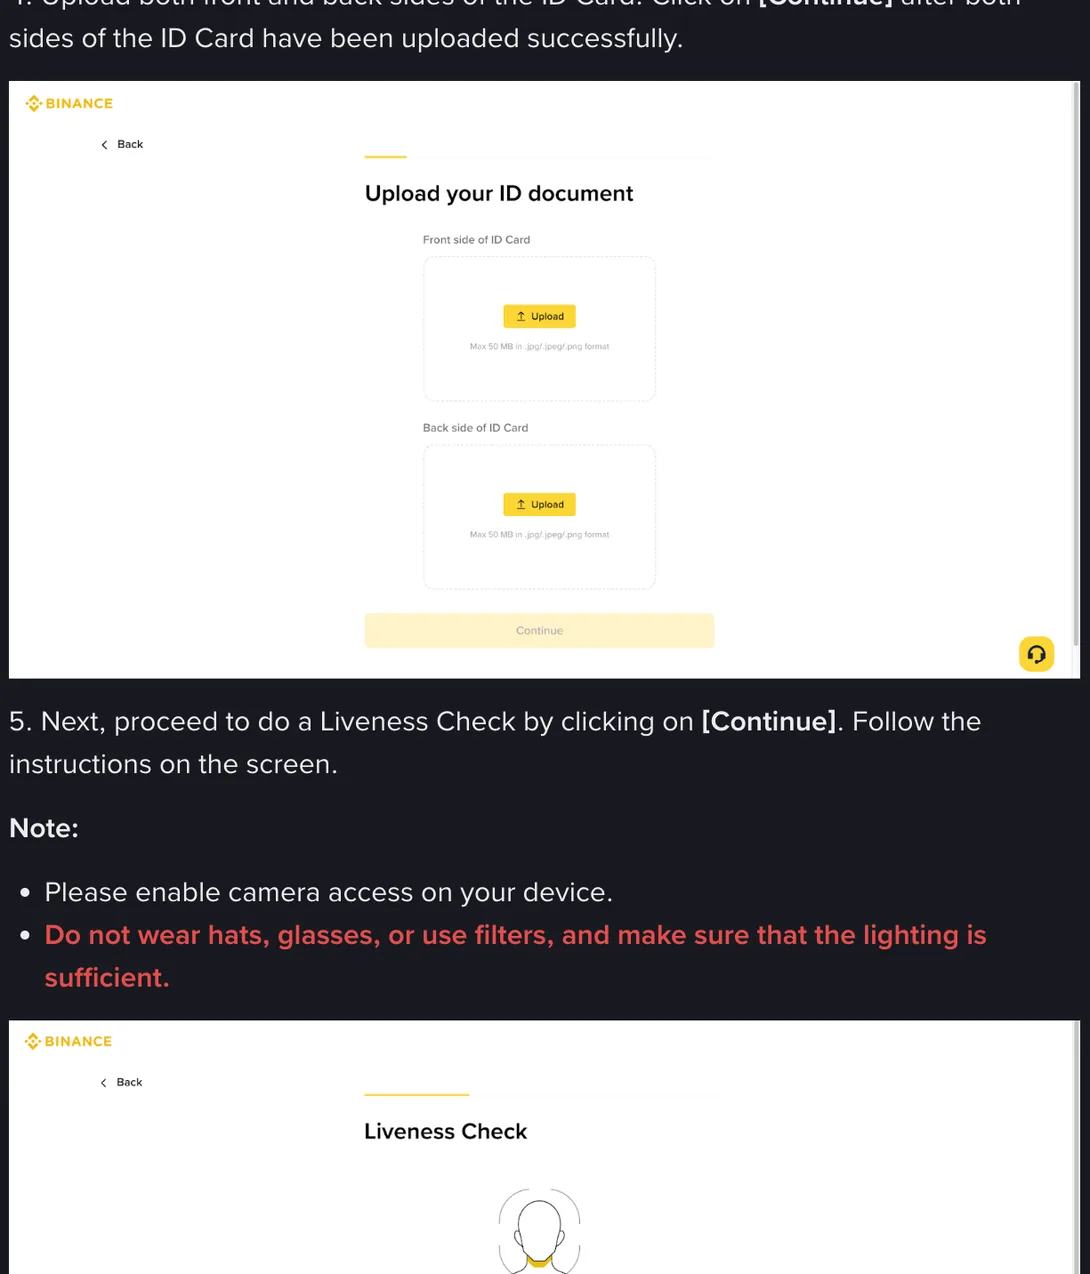
The first is that a card is two uploads. The step reads: upload both front and back sides of the ID Card, and click Continue after both sides have been uploaded successfully. A passport data page is one image. That is not an argument for either choice, but it is a reason to have both sides photographed before you begin rather than discovering the back is required while a session is open.
The second is printed under each box:
Max 50 MB in .jpg/.jpeg/.png format
Fifty megabytes, not the two megabytes repeated in most tutorials. Nobody needs to compress a phone photograph to get under that ceiling, and compressing it is how detail gets destroyed. The format list is the real constraint: three image formats, so a PDF scan from a shop has to be exported to an image first. Big files have their own failure mode on a weak connection, which is a network problem rather than a rule, and the page on photographing your document deals with both.
Country by country, the least trouble
Least trouble means the route that usually goes through with the fewest corrections, not the only permitted route.
And the table cannot show everything that moves. Which document types this flow offers you is generated from the issuing country you select and from what Binance is applying to that country at the time, both of which get revised. So treat these rows as notes rather than counsel, and nothing on this page as legal or investment advice.
| Where you live | Usually the least trouble | Why |
|---|---|---|
| Pakistan | CNIC | It is a card, it sits in the option the interface recommends, and nearly every adult holds one |
| Australia | Passport, driver licence as the fallback | No national identity card exists, and licence layouts differ from state to state |
| South Africa | Smart ID card | Card format, two flat sides; if you still hold the green book, the card is the safer upload |
| Kenya | National ID card | Same reasoning; switch to the passport when the card is worn or the lamination has lifted |
| India | Whichever of yours the flow lists once India is selected | The options are generated from the two country fields, so the list exists on the screen a minute before it could exist in a table here |
| Anywhere, holding two valid documents | The one whose printed name matches your bank | Every later step compares that name, and the bank is the slowest thing to change |